Signer Sewing/Embroidery Futura XL-400 — Error 10
For this embroidery machine, the manual documents “error 10” as:
Hoop size too small to move the hoop to original position.
Turn off power switch and attach larger hoop. (Error 10 solved. See below)
Given the issue I’ve just resolved, I’d suggest Singer use this more accurate description description:
General hoop error, or hoop size too small to move the hoop to original position.
- Turn off power switch and attach larger hoop.
- Verify hoop identifiers
- Verify hoop sensors
Symptom
With the embroidery accessory attached, when powering up the machine, the embroidery attachment does not move/reset. Lights on the main unit flash and then indicate “error 10”. Note, under normal operation, resets immediately while lights flash on them main unit.
When the embroidery accessory is removed, the main portion of the unit (basically a sewing machine) starts up normally. No error is indicated.
Problem
I’m not sure how to generate a valid “Hoop size too small to move the hoop to original position.” on startup. Maybe there exists a third size hoop that does not work with this machine, but that’s a stretch. I have no clue even what “original position” is. If the hoop is too small in general, the software will prompt to move the fabric so the hoop is positioned properly to continue the pattern.
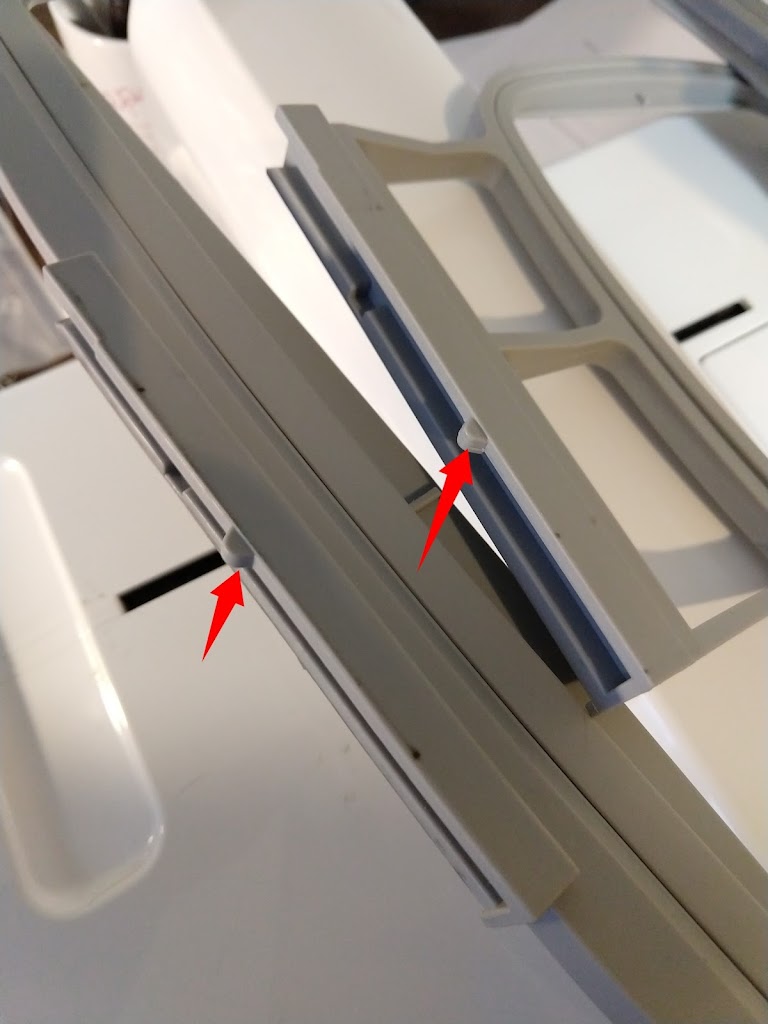
First thing to check is that the hoop identifiers have not been warn or damaged. See the two hoops below. The red arrows point to the hoop identifiers that are in different positions along the hoop mounting bar.
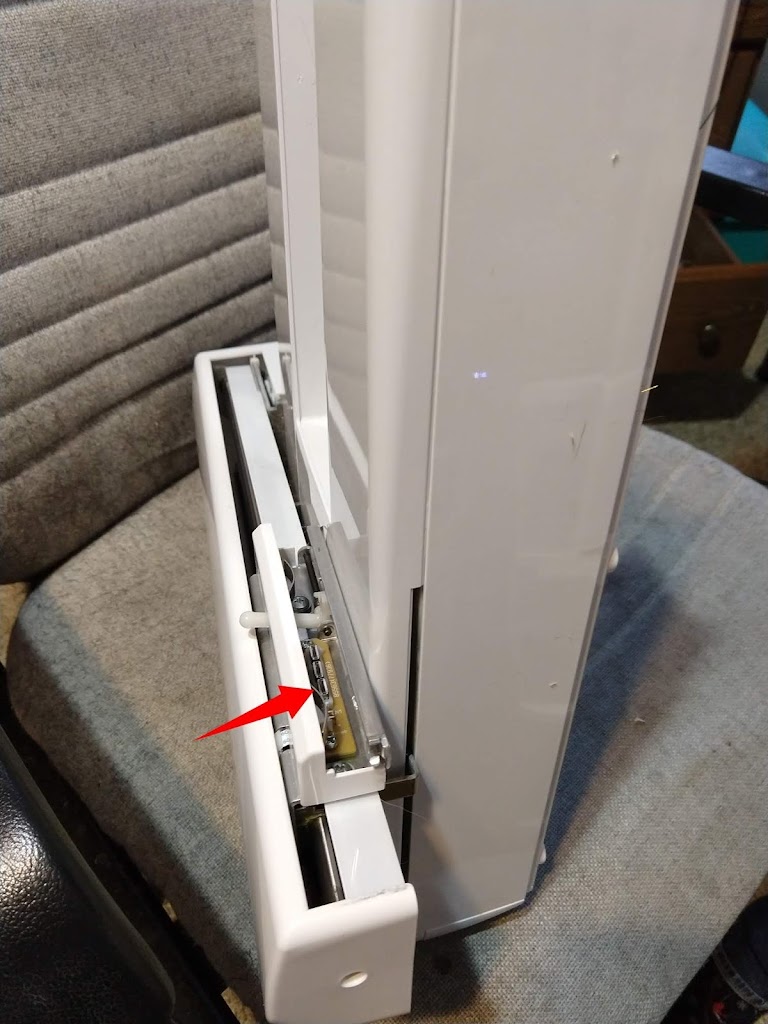
The hoop identifiers align with the hoop sensors that are identified below. The red arrow points to the area where there are three hoop sensors. Note, the embroidery attachment is turned vertical.
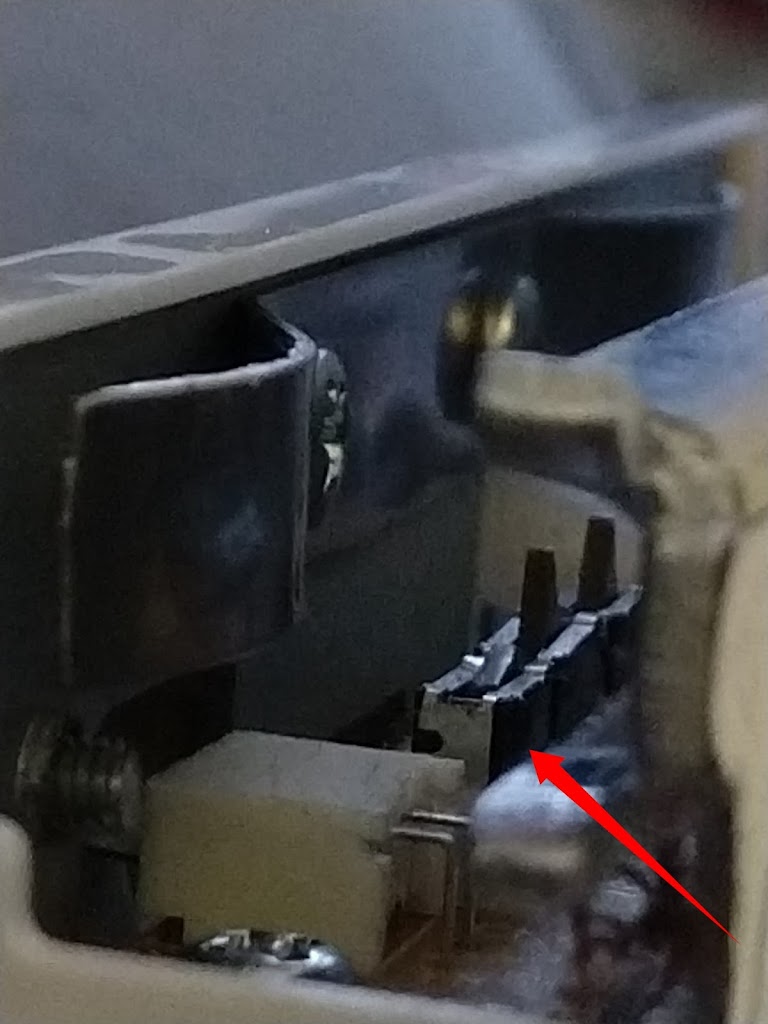
Below are the three sensors. Note that one of the sensors is not like the others. See the red arrow. When the hoop identifiers come in contact with the sensors, the sensor arms fold down at 90 degrees. The odd sensor is folded down at 90 degrees, and stuck.
Resolution
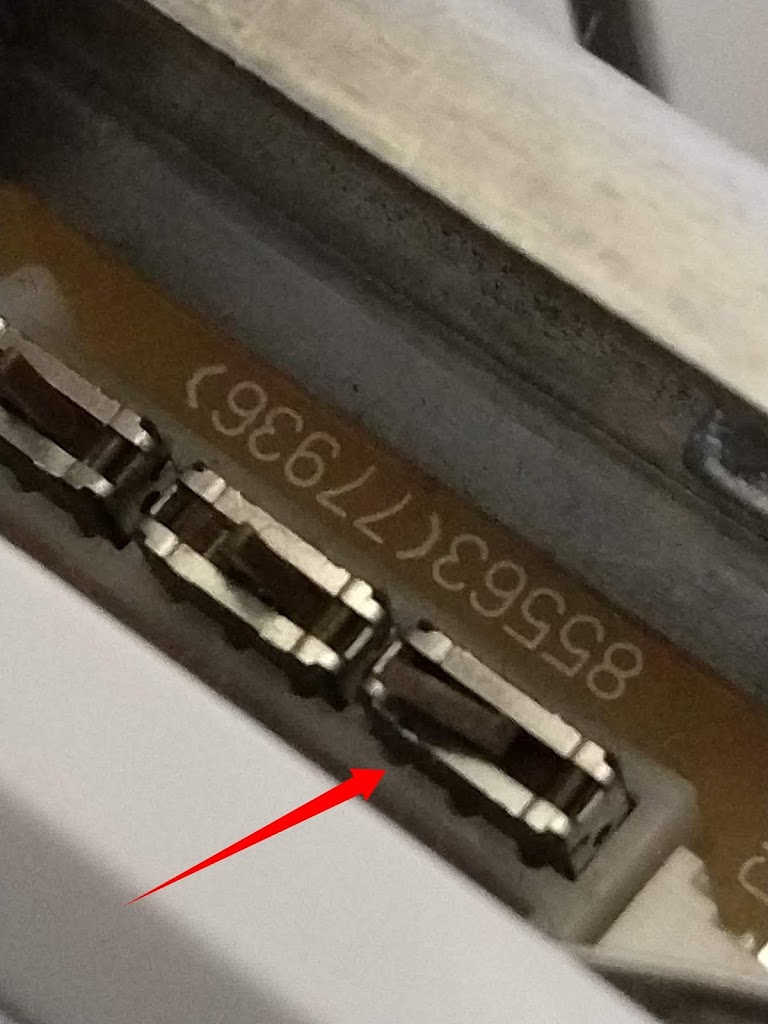
Use a convenient tool to free the stuck sensor. I used a pocket knife. Be careful to not use too much side force. Below you can see the third sensor in process of being freed. It’s at about a 45 degree angle here. Once it returned to the normal position, it functioned normally.
Can you contribute to the goal of assisting someone else in this situation? If so, please comment.
UPDATE 28-Jul-2019, over the past five months I’ve had to adjust this switch two times. Mainly it seems stuck at 90 degrees. I lay it back to the approx 45 degrees, similar to the other two switches, and I make sure it functions as smoothly as the other two switches.
Keywords: singer futura xl 400 error 10 error,10 error#10 error.10 on startup bootup boot starting
blog 9-Mar-2019
My Random Things

THANK YOU! This was the most helpful thing I found online and exactly what I needed. I would have never figured this out myself 🙂
Thanks it has helped
OMG Thank you so much! I was so afraid I'd have to service this old machine!
Thank you it worked for a while but not the sensor is very lose and wont function anymore