FoodSaver v3230 will not power on or show any lights/led’s

18-Mar-2019
MyRandomThings keywords: foodsaver food saver v3230 v 3230 no lights no led’s no power dead broken won’t boot will not boot no poweron 

Resolution Summary

User error. To power the device on (to see front panel LED’s light up)
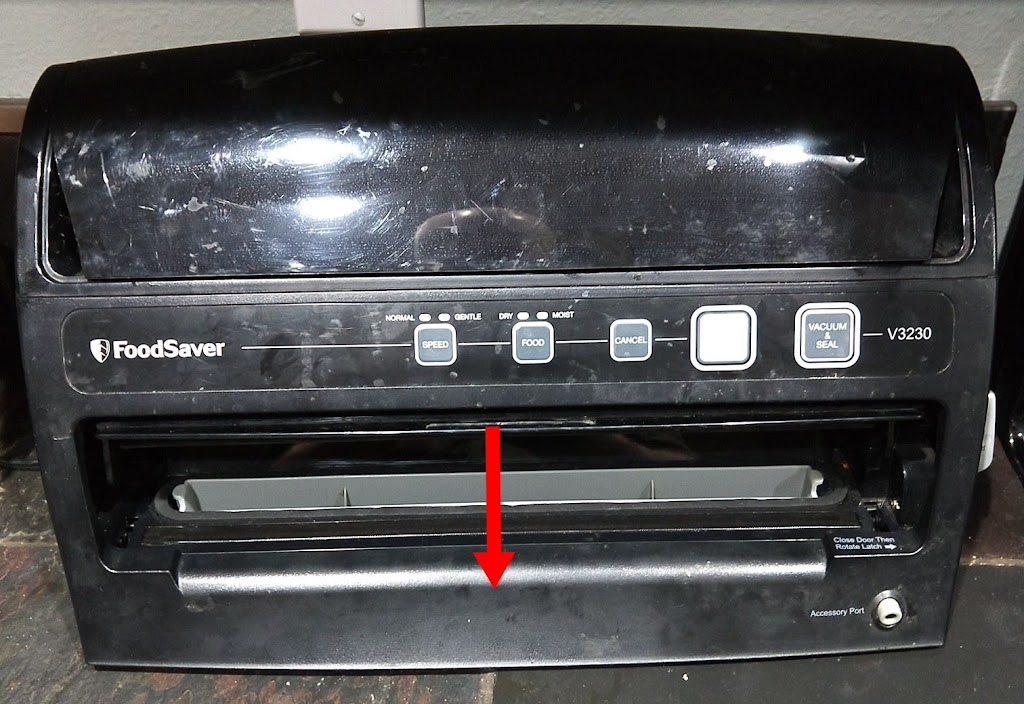
  • Close front lower door as if to compress a bag be vacuum sealed
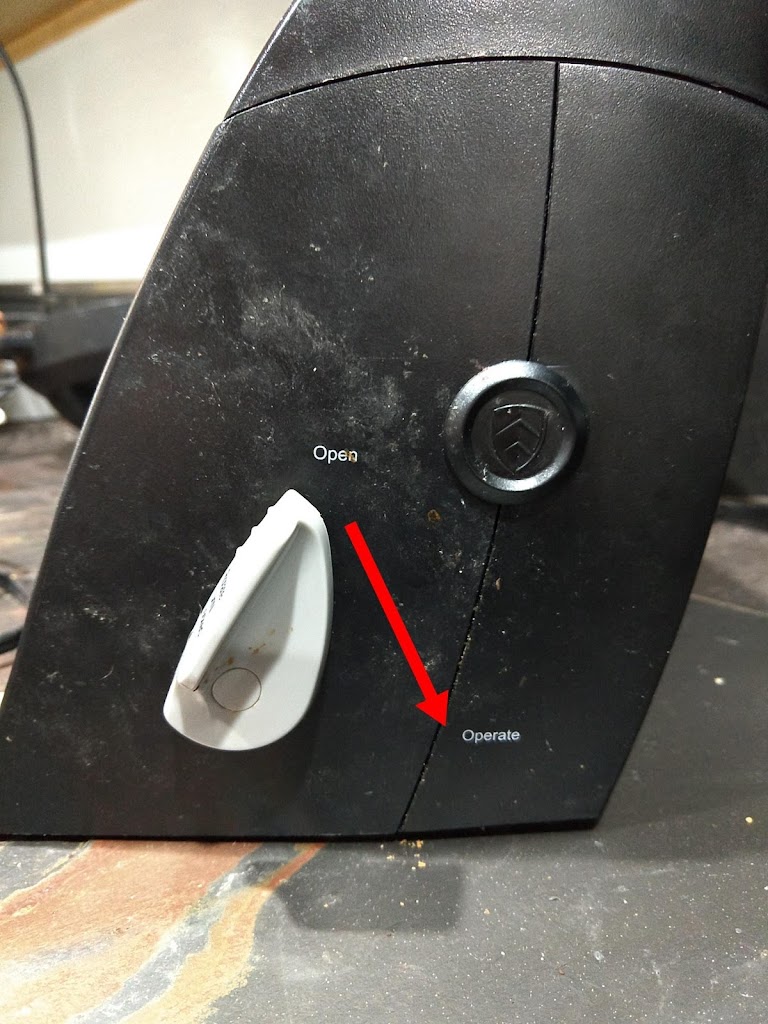
  • Move the knob on the right side of the appliance from the “Open” position to the “Operate” position.

Description/Symptom

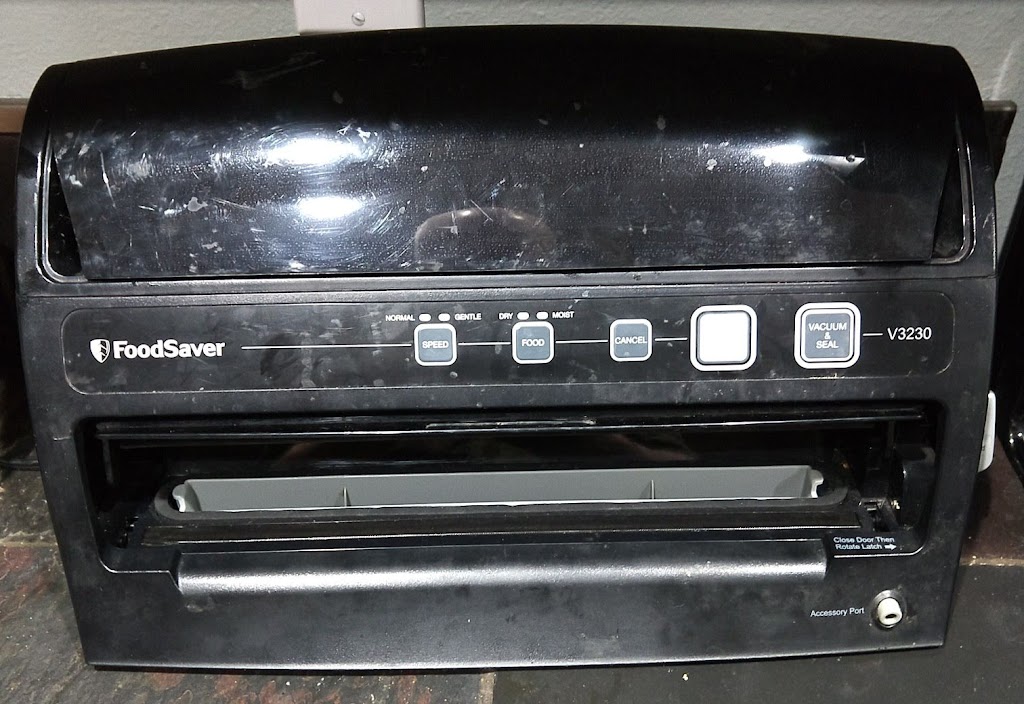
When the FoodSaver V3230 is plugged in, no LED’s light. The unit appears dead. There is no power button. One should expect two green LED’s to light, one labeled “Normal” and the other labeled “Dry”.

Diagnosis

Verified the wall outlet was functioning properly.
Verified the power cord was in good condition.
Dissembled the unit to verify the existence of a fuse and to verify the fuse is passing current as expected.

Resolution

The wall outlet was functioning properly.

The power cord is is good condition.

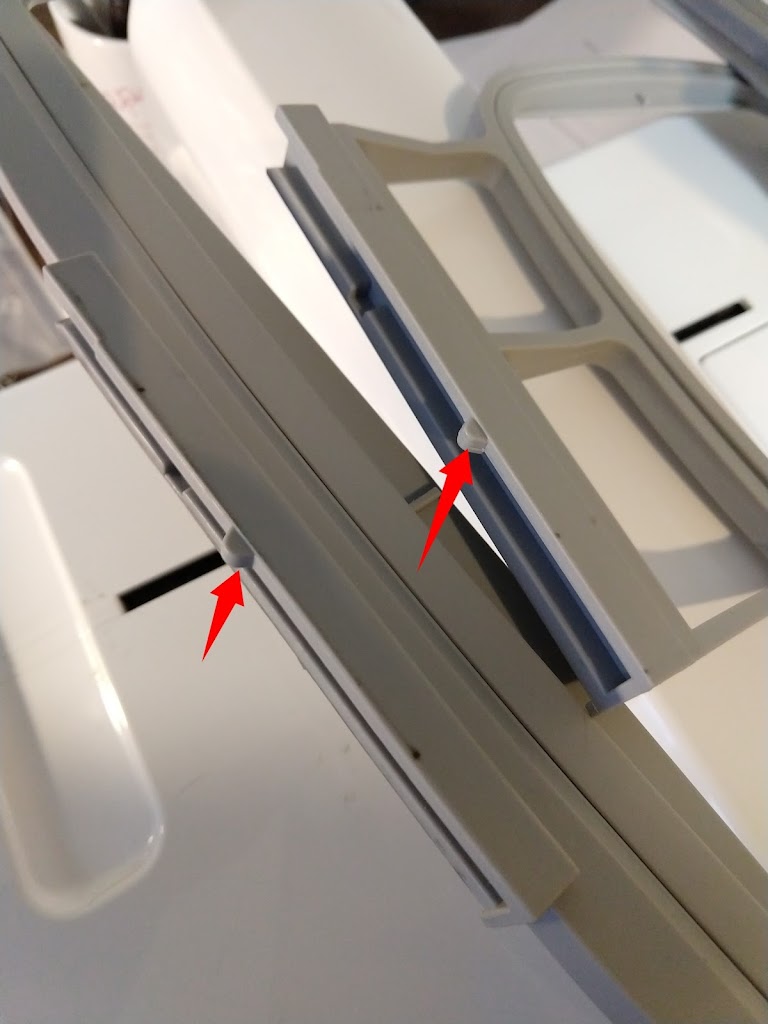
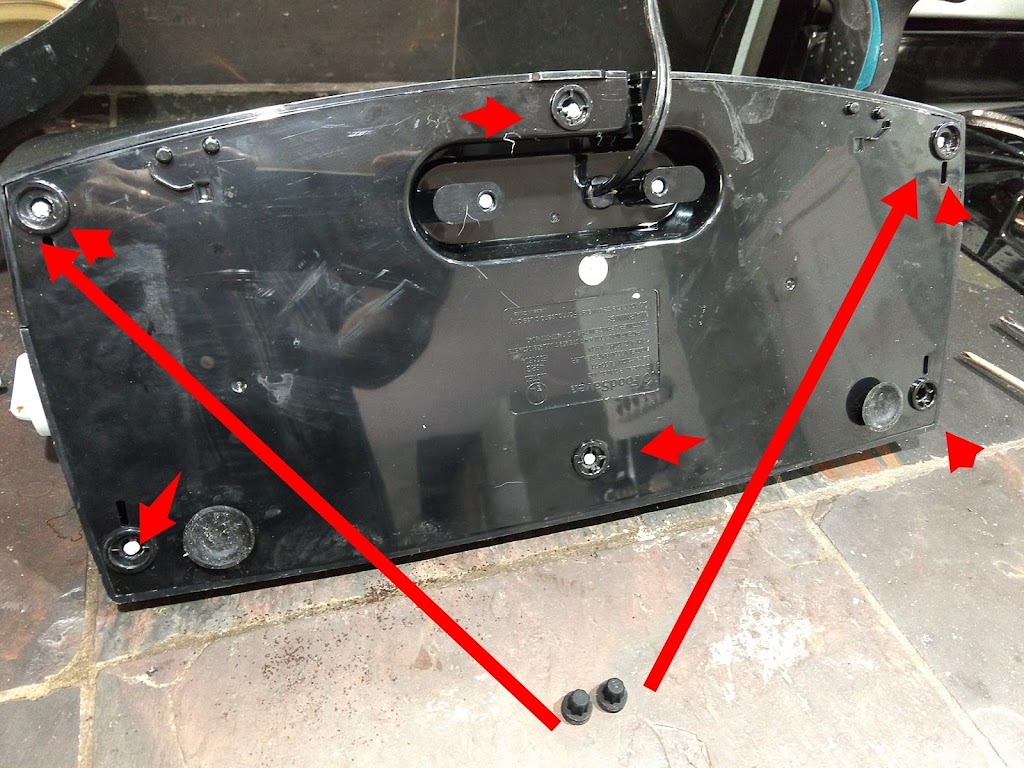
Disassembly from the bottom. There are six Phillips/#2 screws to remove. Two back/corner screws are located behind rubber feet. Once the six screws are removed, separate the bottom plastic cover from the unit by pulling away on one of the suction cups located in the bottom corners of the below photo.

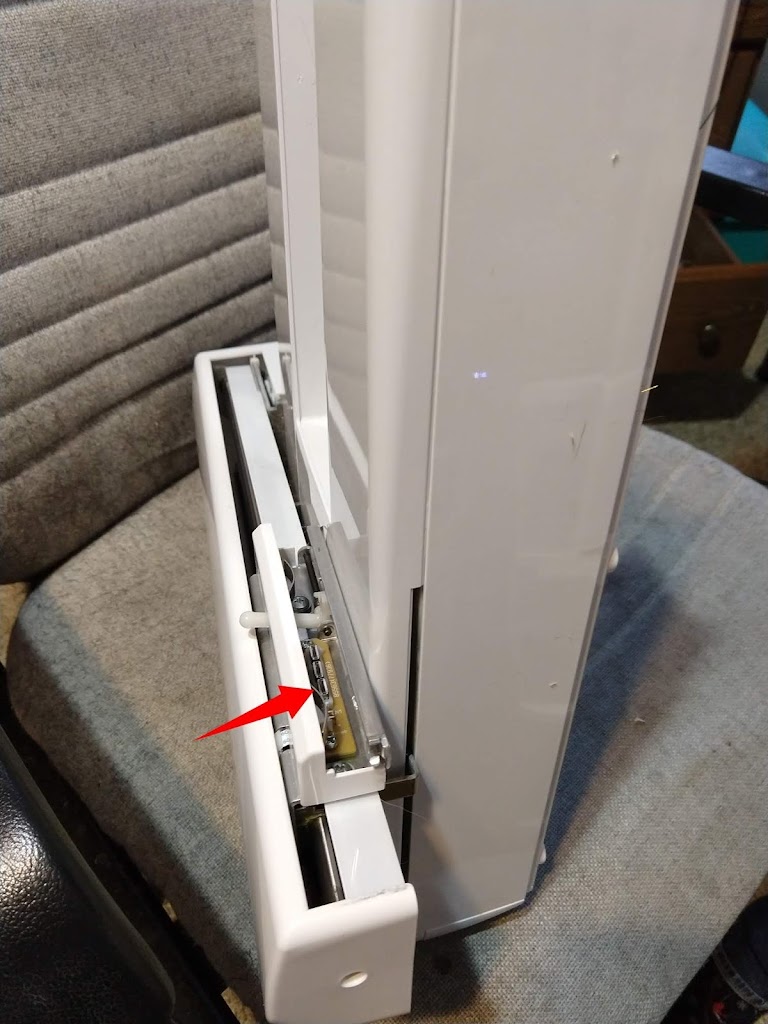
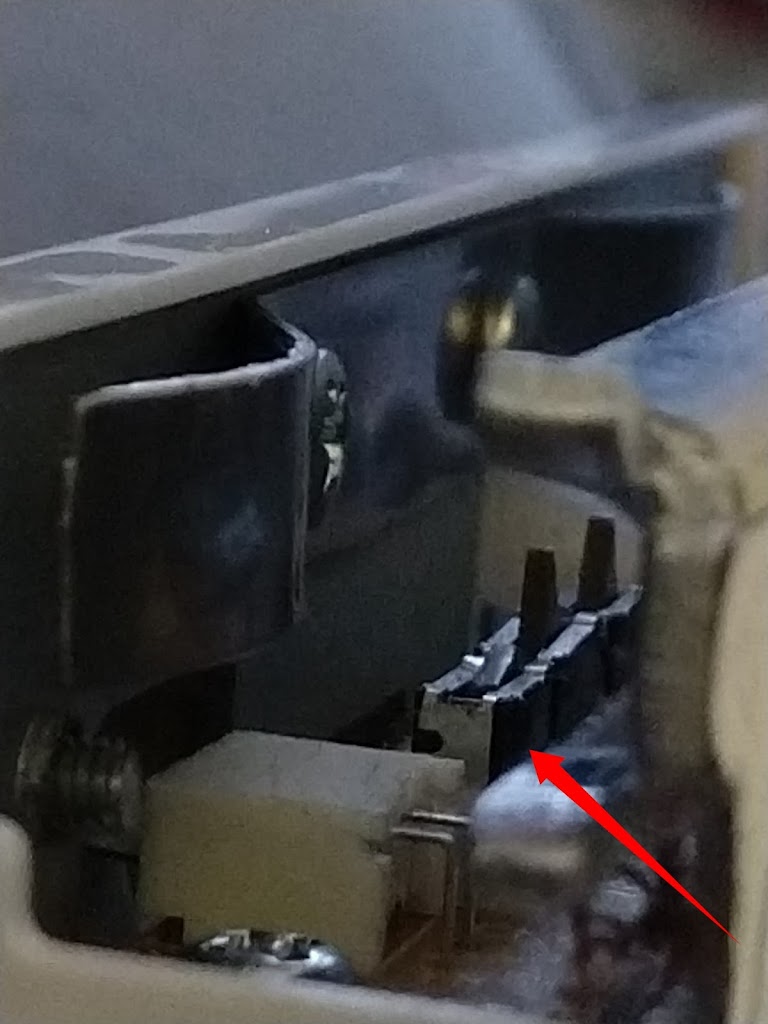
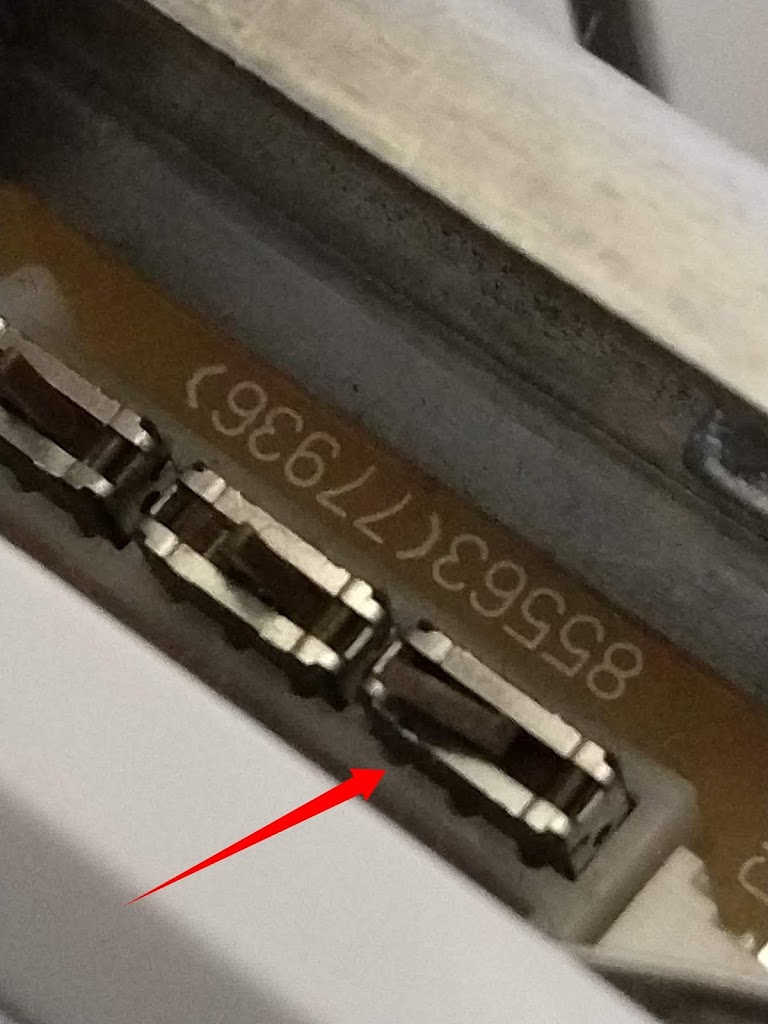
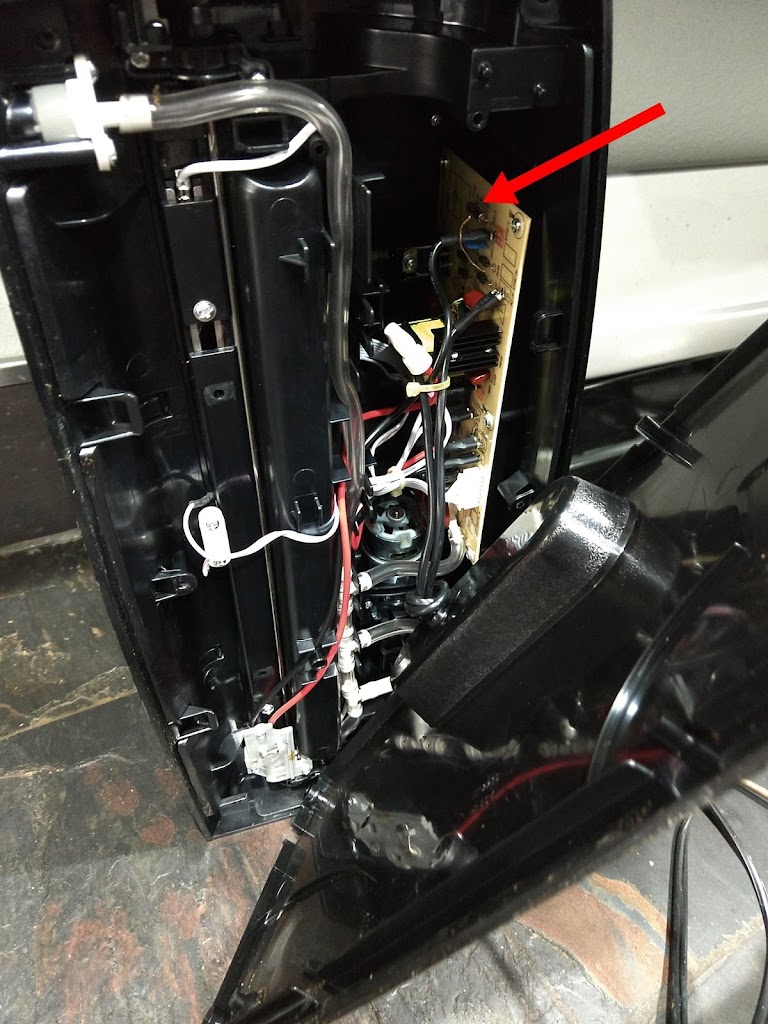
Locate the fuse that is soldered to the printed circuit board. The below three photos are provided to review the internal workings of the device and to assist in locating the fuse.

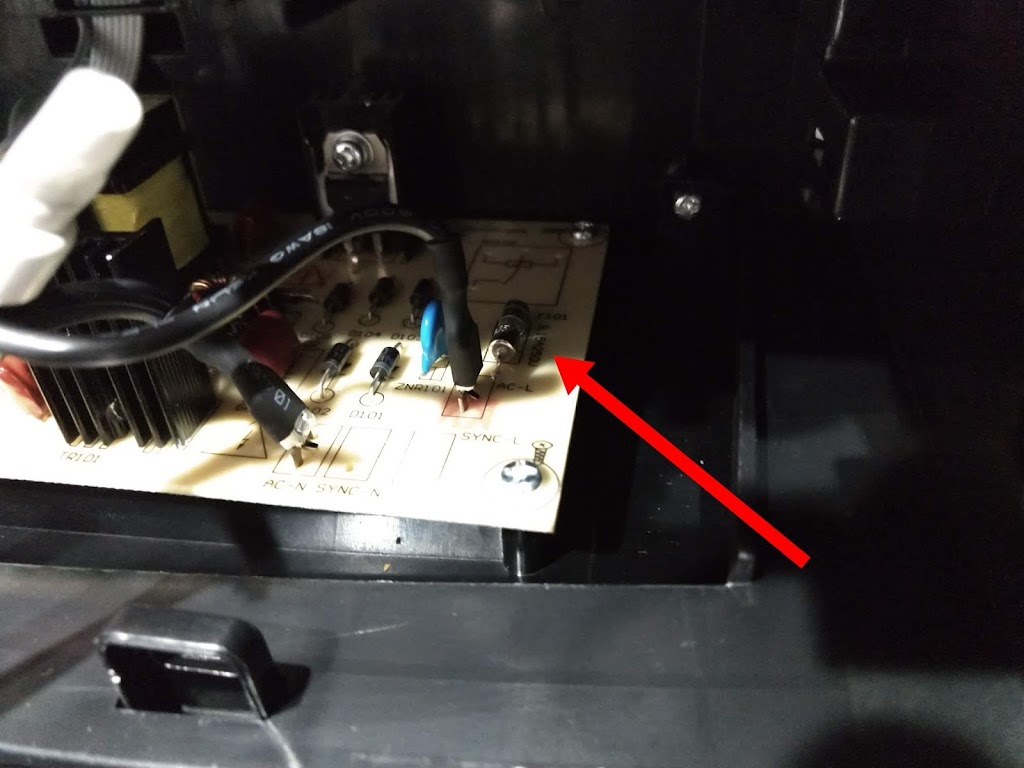
The fuse can be tested by removing it from the printed circuit board and using a continuity tester. I understood the risks and decided to jumper the fuse (ie, bypass the protection of the fuse) to see if the unit then functioned. It did not.
At this point I considered the unit a loss and put it back together. My plan was to replace it with a quality device that would last years like this product sold at Amazon.
But, in the mean time, I had another thought. Since the device had been stored for years until needed, I was not readily familiar with the unit. I played with the device a bit more and discovered it was working all along. To turn it on requires two steps… first, close the front door.

Second, turn the knob on the right side of the device from “Open” to “Operate”. That brought the unit to life. The two green “Normal” and “Dry” LEDs lit up. Th

So, lots of effort for nothing, other than to describe the process that might be helpful to others.

Troy Frericks.
blog 18-Mar-2019
My Random Things
=
Copyright 2015-2019 by Troy Frericks, http://myrandomthings.com/.
#

Signer Sewing/Embroidery Futura XL-400 — Error 10

Signer Sewing/Embroidery Futura XL-400 — Error 10

For this embroidery machine, the manual documents “error 10” as:
Hoop size too small to move the hoop to original position.
Turn off power switch and attach larger hoop. (Error 10 solved. See below)

Given the issue I’ve just resolved, I’d suggest Singer use this more accurate description description:
General hoop error, or hoop size too small to move the hoop to original position.

  1. Turn off power switch and attach larger hoop.
  2. Verify hoop identifiers
  3. Verify hoop sensors

Symptom

With the embroidery accessory attached, when powering up the machine, the embroidery attachment does not move/reset. Lights on the main unit flash and then indicate “error 10”. Note, under normal operation, resets immediately while lights flash on them main unit.
When the embroidery accessory is removed, the main portion of the unit (basically a sewing machine) starts up normally. No error is indicated. 

Problem

I’m not sure how to generate a valid “Hoop size too small to move the hoop to original position.” on startup. Maybe there exists a third size hoop that does not work with this machine, but that’s a stretch.  I have no clue even what “original position” is. If the hoop is too small in general, the software will prompt to move the fabric so the hoop is positioned properly to continue the pattern.
First thing to check is that the hoop identifiers have not been warn or damaged. See the two hoops below. The red arrows point to the hoop identifiers that are in different positions along the hoop mounting bar.
The hoop identifiers align with the hoop sensors that are identified below. The red arrow points to the area where there are three hoop sensors. Note, the embroidery attachment is turned vertical.

Below are the three sensors. Note that one of the sensors is not like the others. See the red arrow. When the hoop identifiers come in contact with the sensors, the sensor arms fold down at 90 degrees. The odd sensor is folded down at 90 degrees, and stuck.

Resolution

Use a convenient tool to free the stuck sensor. I used a pocket knife. Be careful to not use too much side force. Below you can see the third sensor in process of being freed. It’s at about a 45 degree angle here. Once it returned to the normal position, it functioned normally.

Can you contribute to the goal of assisting someone else in this situation? If so, please comment.

UPDATE 28-Jul-2019, over the past five months I’ve had to adjust this switch two times. Mainly it seems stuck at 90 degrees. I lay it back to the approx 45 degrees, similar to the other two switches, and I make sure it functions as smoothly as the other two switches.

Keywords: singer futura xl 400 error 10 error,10 error#10 error.10 on startup bootup boot starting

Troy Frericks.
blog 9-Mar-2019
My Random Things
=
Copyright 2015-2019 by Troy Frericks, http://myrandomthings.com/.
#